Uncategorized

wall hang ups.

When you have a new canvas, you can spend days and weeks and months trying to decide what exactly to hang on your walls. And that’s what I’ve been doing the past 10 months.

You know what no one talks about when they talk about how great an open floor plan is? That there are less nooks to hang pictures in and more long never ending blank walls to adorn.

Last night I finally hung some plates I purchased at my church garage sale in August. My new dilemma is what to hang in the blank space between them because I still think it needs something.

Here is the wall I’m working with:

IMG_8373 (1).jpg

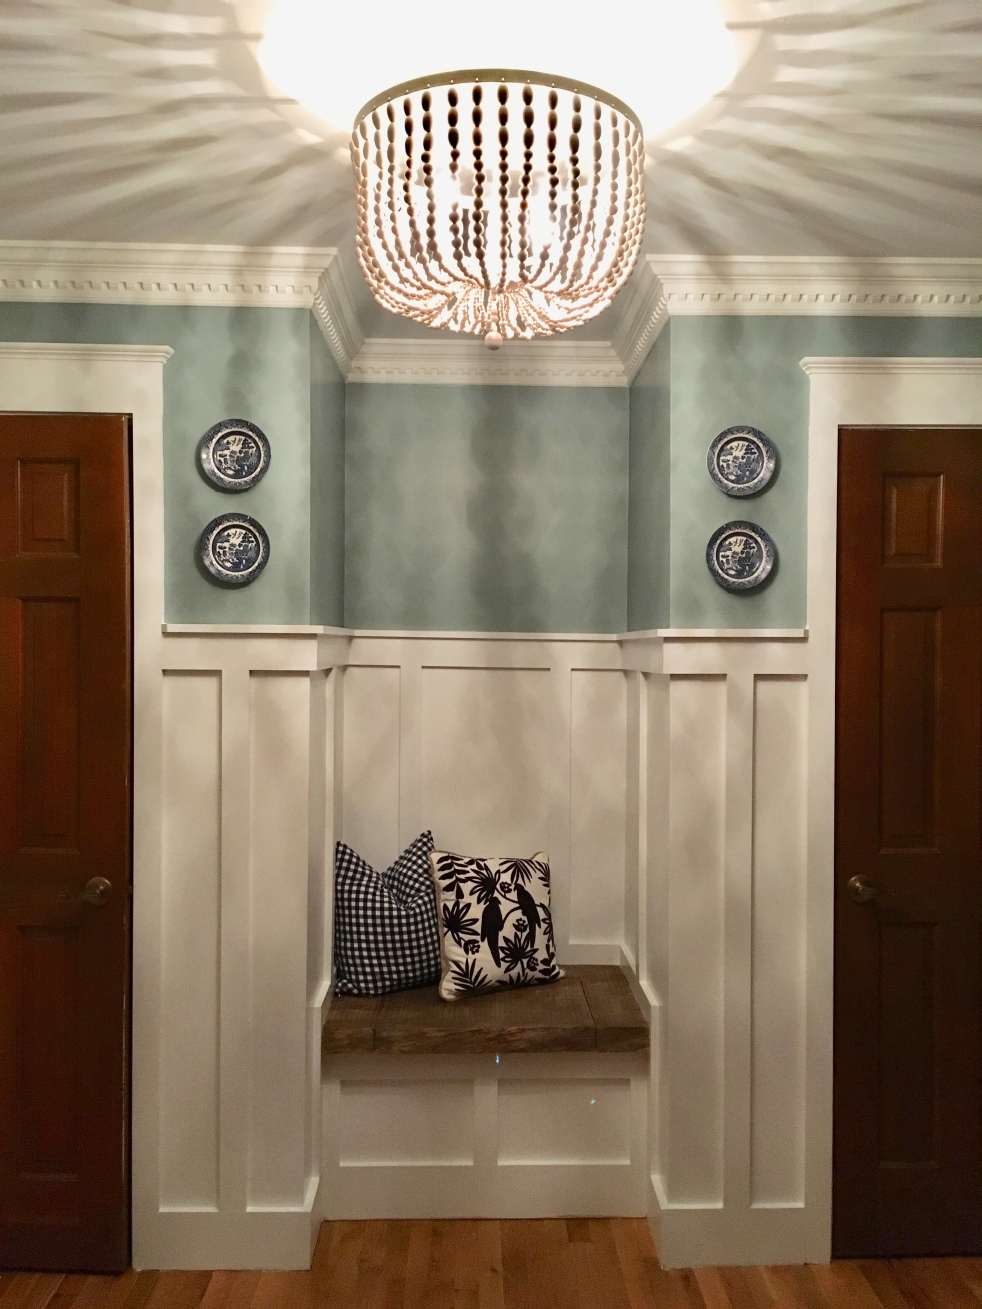
Our foyer had an odd floating glass top table between the two closet doors and we removed that table and D installed batten board and a built-in live edge bench. Here is my inspiration for this room from The White Buffalo Styling Co.:

IMG_8384

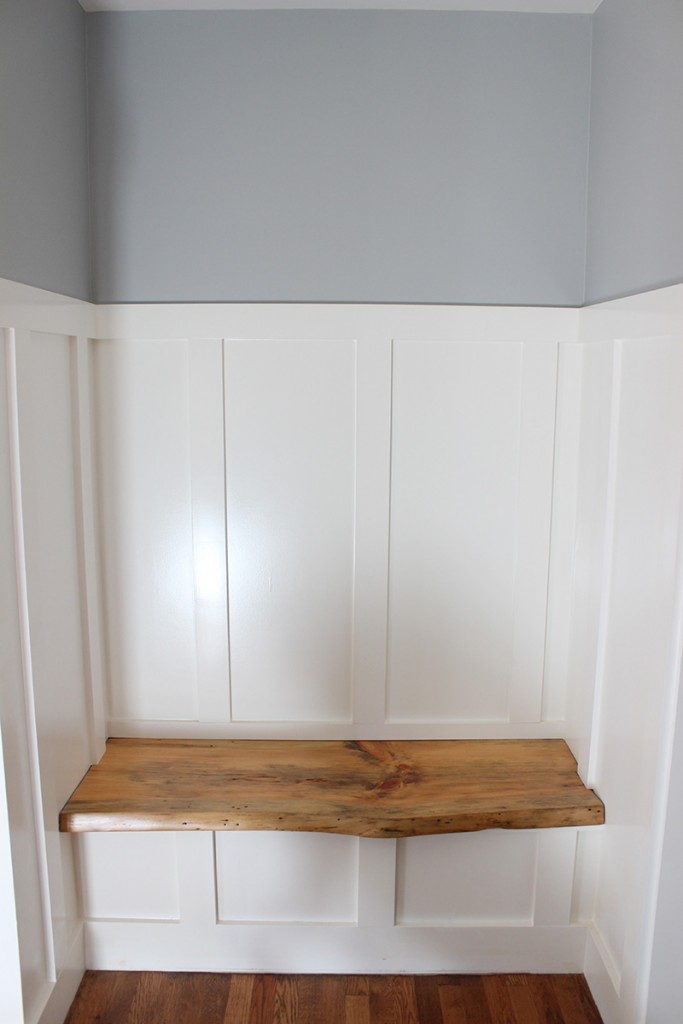
D did a pretty bang up job. Because this is in our foyer and we enter the house through the opposite end of the house, I’m not going to add wall hooks here like I’d originally planned. It’s between two coat closets so it’s not really necessary.

IMG_8385

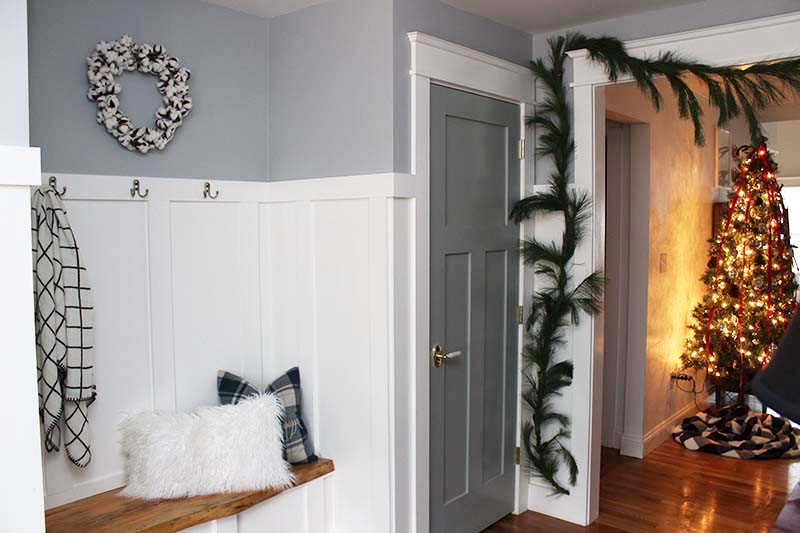
So here’s my question: what do I put over the bench? Here are my current recommendations:
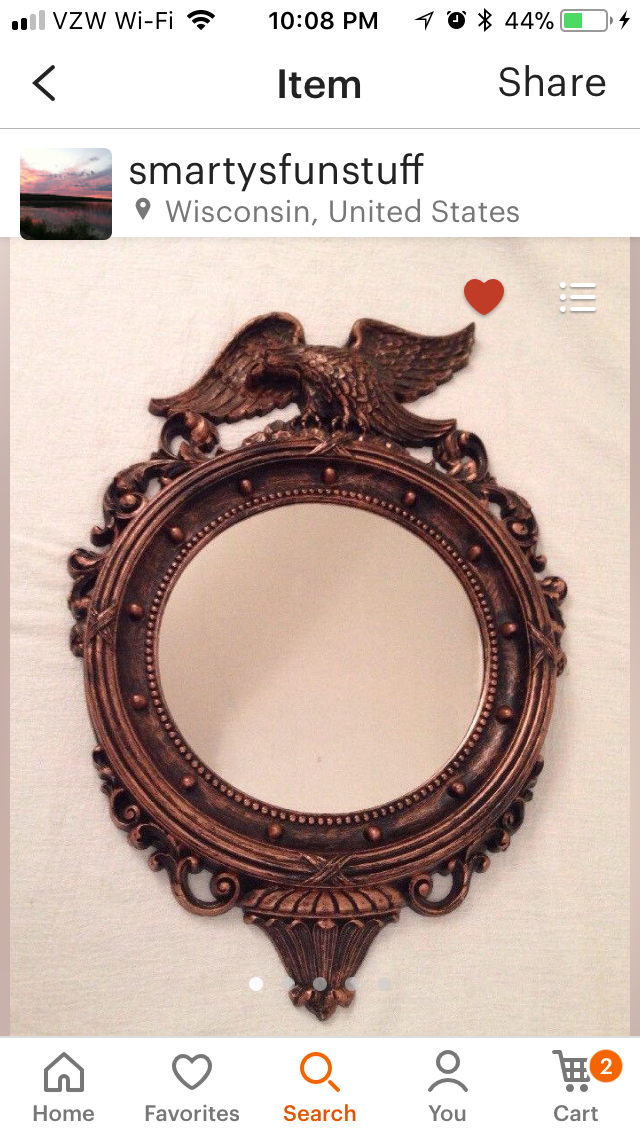
  • A mirror
    • I love this idea as I love mirrors in rooms and think they make the room feel bigger. Opposite this space is a cased opening into a formal living room followed by a cased opening into a dining room which faces a mirror as well. There’s also a mirror on the same wall in the room you would enter to the right.
    • My preference is for a federal mirror like this:IMG_8382
    • I also like the simplicity of a gold frame round mirror, though I might replace the one in the next room with something like that
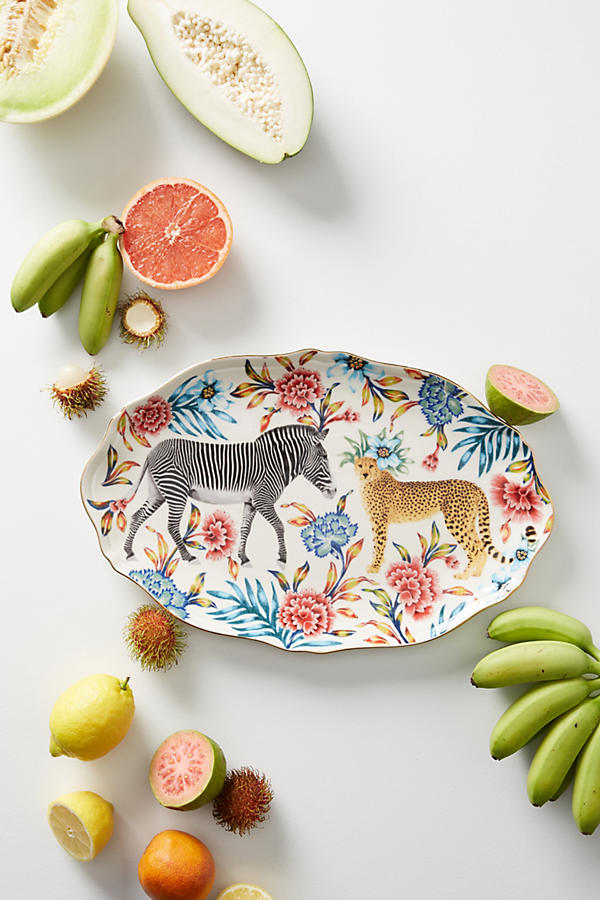
  • A tray/platter – I had considered one like the one below but don’t know that it would necessarily flow with the blue willow plates or fill the 30″ x 30″ space.
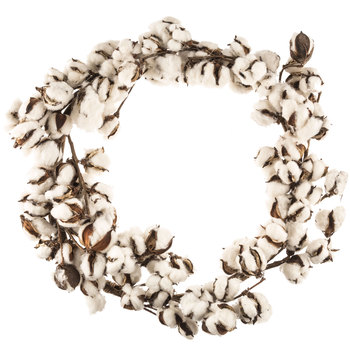
platter
  • A wreath
    cotton
  • Nothing

Help me!

Uncategorized

the lighting dilemma.

It’s so great having a talented, handy husband but the worst part — the part that no one ever thinks about — is that when I come up with something I want for our house I get a big ole siiiiiiiiiiiiiiigggggghhhhhhh and a “I’ve put that light up in soooo many houses.” Of course I take that as man, Kristin, you’ve got good taste. Unfortunately, he does not.

That said, I decided the other day that I wanted a particular light fixture in our dining room. And I get it … I mean, even have picked this out, purchased it, and uh “put it up in another house” (ie D put it up for me). But it wasn’t my house, I didn’t get to live in it and enjoy it, and seeing it in this home made me love it even more. And now D is sick of it.

So, here’s the want I want(ed):

light

And here’s one I’m considering instead:

FullSizeRender

So, what do we think?

Uncategorized

enchilades verdes.

Last night, Blakely and I cooked dinner for D and tried out a new recipe. We made some slight adjustments to it and I can’t imagine it any other way.

Enchilades Verdes

Ingredients:

  • 1 lb (2) boneless, skinless chicken breasts
  • 1 onion, halved and divided
  • 1 teaspoon salt
  • 8 large white corn tortillas
  • 3 cups salsa verde
  • 1 cup crumbled queso fresco
  • taco seasoning
  • sour cream, optional to serve
  • cilantro, optional garnish

DIRECTIONS:

  1. Preheat oven to 400 degrees F.
  2. Place the chicken breasts in a pot along with 1⁄2 an onion and salt and cover with water. Bring to a boil and simmer until cooked through, about 20 minutes.
  3. Remove chicken from the water and let cool slightly. Shred chicken with two forks and set aside.
  4. Mince the remaining onion and add to the shredded chicken, along with taco seasoning as desire.
  5. Using a basting brush, paint tortillas (I warmed them up in the toaster oven) with salsa verde. Fill each tortilla with chicken and roll tightly and place in a large casserole dish, seam side down, in a single layer. Repeat with the remaining tortillas and chicken.
  6. Drench entire pan with 1 cup sauce and sprinkle with crumbled queso fresco.
  7. Bake, covered in oven for 25 to 30 minutes. Remove from oven and serve with sour cream or additional queso fresco, if desired.

FullSizeRender

Uncategorized

mini bell pepper loaded turkey nachos.

In honor of the fact that I’m eating leftovers of this for lunch today, I thought I’d share a recipe for some “nachos” I made over the weekend.

Mini Bell Pepper Loaded Turkey Nachos

Ingredients:

  • olive oil spray
  • 1 lb lean ground turkey
  • 1 clove garlic, minced
  • 1/4 onion, minced
  • 1 tbsp chopped fresh cilantro or parsley
  • 1 tsp garlic powder
  • 1 tsp cumin powder
  • 1 tsp kosher salt
  • 1/4 c tomato sauce
  • 1/4 c chicken broth
  • 21 mini rainbow peppers, halved and seeded
  • 1 cup sharp shredded Cheddar cheese
  • 2 tbsp light sour cream, thinned with 1 tbsp water
  • 2 tbsp sliced black olives
  • 1 jalapeno, sliced thin (optional)
  • chopped cilantro, for garnish

Directions:

1. Preheat oven to 400 degrees and line a large baking try with parchment or aluminum foil. Lightly spray with oil.
2. Spray oil in a medium nonstick skillet over medium heat.
3. Add onion, garlic and cilantro and saute about 2 minutes, add ground turkey, salt, garlic powder, cumin and cook meat for 4 to 5 minutes until meat is completely cooked through. Add 1/4 cup of tomato sauce and chicken broth, mix well and simmer on medium for about 5 minutes, remove from heat.
4. Meanwhile, arrange mini peppers in a single layer, cut-side up close together.
5. Fill each with cooked ground turkey mixture, then top with shredded cheese and jalapeno slices, if using.
6. Bake 8 to 10 minutes, until cheese is melted.
7. Remove from oven and top with black olives, sour cream and cilantro. Serve immediately.

IMG_5183.JPG

beer · Uncategorized

chicken enchilada stuffed shells.

I realized last night as we sat down for dinner that we do a LOT more eating at home now than we ever did, and very little eating out. It makes me happy to think of that, as it seems like a level of success I’ve always strived for — to plan out dinner and cook for my family throughout the week. (Hey, I have small goals.) I picked this up from Anthropologie last week and started out by writing out our week and coming up with what we needed from the grocery store. This way, D knows my schedule (like that I have bunko Tuesday night) and when to expect things (he’s already excited about spaghetti on Thursday — good thing, since he’ll be cooking it).

Last night, I cooked this as a cheat meal for a successful work day at home. And because it sounded delicious and I had to have it stat.

IMG_5210.JPG

Chicken Enchilada Stuffed Shells

Ingredients:

2 c. cooked shredded chicken – I used a rotisserie chicken.
1 T taco seasoning
3/4 c. sour cream
1 roasted red pepper, chopped – I just used a red bell pepper and didn’t roast it. But I think next time I’m going to pick up roasted bell peppers either by the jar or on the hot food bar at Kroger.
2 T chopped cilantro, plus more for garnish
1 T chopped green onion, plus more for garnish
1 large tomato, diced – I just used 2 small ones I had.
2 c. grated Monterey or Pepper Jack cheese – I used cheddar inside the shells and shredded some sliced jalapeno cheddar cheese for the top because we had that in the fridge.
18 jumbo pasta shells, cooked
 
White Enchilada Sauce:
3 T unsalted butter
3-4 T flour
1 (14.5 oz.) can low-sodium chicken broth
1/3 c green salsa
1/4 c sour cream

Directions:

1. Preheat oven to 350 degrees.
2. In a medium bowl, combine shredded chicken, taco seasoning, sour cream, chopped red pepper, 2 T chopped cilantro, 1 T chopped green onion, 1/2 of the diced tomato and 1 cup of grated cheese.
3. Divide filling between the cooked jumbo shells and place in a greased 8″ x 8″ inch casserole dish. Set aside.

For the Enchilada Sauce:
4. In a medium skillet over medium heat, melt the butter. Whisk in the flour, one T at a time, until a thick paste forms. Cook for two minutes, stirring occasionally.
5. Gradually whisk in the chicken broth and continue whisking until smooth and sauce reaches desired creamy thickness. Stir in the green salsa and sour cream.
6. Pour sauce over stuffed shells. Top with remaining cheese.

7. Bake for 20 minutes or until cheese is melted and bubbly.
8. Broil for a few minutes until cheese is browned.
9. Garnish with additional chopped cilantro, chopped green onions and remaining chopped tomato. Serves: 3-4, depending on how many shells each person can eat.

Also, I washed it down with a beer we picked up from Vino Garage recently. It was malty and delicious.
IMG_5215.JPG
Uncategorized

risotto with roasted chicken & carmelized onions.

Confession: I’ve never made carmelized onions before. (I know this isn’t a shock to those who know I didn’t make my first grilled cheese until approximately 3 years ago. Hey, they’re just better when someone else makes them.)

The other night, I didn’t know what to make for dinner. I know we had an untouched rotisserie chicken in the fridge, and we always keep arborio rice in the cupboard. So that’s what I had to work with.

And then I went to Google. Here’s what it gave me …

Roasted Chicken with Risotto and Carmelized Onions

Ingredients:

4 T olive oil, divided
1 onion, chopped
1/4 cup balsamic vinegar
1 1/2 cups uncooked arborio rice
1/4 cup dry white wine – This is why I keep a cheap bottle of white from Trader Joe’s on hand.
7 cups hot chicken broth
2 T butter
2 cups chopped cooked chicken breast
salt and pepper
2 T chopped fresh thyme

Directions:

  1. Heat 2 T of the oil  in a medium saucepan over medium heat. Stir in the onions and saute for 15-20 minutes, or until the onions are a dark golden brown. Remove from heat, stir in the balsamic vinegar and set aside.
  2. Heat the remaining oil in a separate large skillet over medium heat. Stir in the rice and mix well. Let heat for about 2 minutes, then pour in the wine. Reduce heat to medium low and start pouring in the broth about 1 cup at at time. Add more broth as each cup is absorbed. Continue in this manner until all the broth is absorbed and the rice is al dente, about 20 minutes.
  3. Stir in the reserved onion mixture and allow to heat through. Remove from heat and stir in the butter and chicken. Season with salt and pepper to taste, and garnish each serving with fresh thyme.

It was all right, but definitely could’ve benefited from some more seasoning – and it did, when I ate the leftovers. At D’s recommendation I added Tony Chachere’s Creole Seasoning and – boom – so much better.

Uncategorized

pickin’ in weco.

On this episode of “do I need this?” I visited some antique shops in West Columbia. Here is what I found:

Obviously I could find a place for everything you see here. Getting D on board for needing it all? That’s a bit of a different lobbying endeavor.

Also, I clearly need more tabletops for my pretty little funky collectibles.

Oh wait, that’s 3 tables in one in my collage of finds. Hmm …

Uncategorized

chicken fajita roll-ups.

Have you ever paid attention to how much dairy you eat?

Let’s be real — I mainly just eat a lot of cheese. I drink milk and eat yogurt, too. But cheese. That’s my jam. Grilled, plain, in everything. You name it.

So, I decided I’d try to give it up. “You’ll have more energy,” they said. “You’ll feel amazing,” they told me. “It’ll help you lose that [baby] weight,” they promised.

Nonsense.

I have found some recipes that don’t require cheese – shocking, I know – that are pretty good, though. This one I was able to throw together one night while Blakely was bouncing around the jumperoo underneath me.

Ingredients:
  • For the Marinade:
  • 2 Tbsp olive oil
  • juice of half a lime
  • 1 clove garlic, minced
  • 1 t chili powder
  • ½ t cumin
  • ½ t dried oregano
  • ½ t salt
  • pinch of cayenne pepper (optional)
  • 2 T cilantro, chopped
  • For the Chicken:
  • 3 chicken breasts or 6 thin sliced chicken cutlets ¼-inch thick
  • ½ red bell pepper, sliced
  • ½ yellow bell pepper, sliced
  • ½ green bell pepper, sliced
Directions:
  1. In a small bowl, whisk together olive oil, lime juice, garlic, chili powder, cumin, oregano, salt, cayenne (if using) and cilantro. Set aside.
  2. Slice chicken breasts longways into 2 even slices and firmly pound the chicken to an even thickness of about ¼ inch.
  3. Place chicken cutlets into a large resealable freezer bag and pour marinade over top, making sure they are completely coated. Allow chicken to marinate for a minimum of one hour to overnight.
  4. Once chicken has marinated, evenly place 6 bell pepper slices in the middle of the chicken cutlet, roll up and secure with a toothpick. Repeat this step until all the cutlets have been rolled up and place seam side down in a prepared baking dish.
  5. Brush tops of chicken with remaining marinade and bake, uncovered, at 375 for about 25 to 30 minutes or until the juices run clear. Serve and enjoy!
Uncategorized

oven baked spicy chicken tacos. 

After a long day away from home and out and about in Columbia yesterday, I threw these together for dinner last night when we came home.

Oven Baked Spicy Chicken Tacos

Ingredients:

  • 1 tablespoon olive oil
  • 1/2 pound cooked chicken, shredded (I used cooked Rotisserie chicken)
  • 1 packet Old El Paso Hot & Spicy Taco Seasoning
  • 1/2 cup onion, diced
  • 1 (14.5 ounce) can diced tomato, drained
  • 1 (4.5 ounce) can Old El Paso Chopped Green Chiles
  • 10 Old El Paso Stand and Stuff Taco Shells
  • 1/2 (16 ounce) can Old El Paso Refried Beans
  • 2 cups Mexican Blend Cheese, shredded
  • Toppings — we just used salsa and sour cream. 

Directions:

  1. Preheat oven to 400 degrees. Line a 9×13 baking dish with foil.
  2. Heat olive oil over medium heat in a medium skillet.
  3. Add onion to skillet and cook for 2-3 minutes, or until the onion is translucent and fragrant.
  4. Stir in the chicken, taco seasoning, tomatoes, and green chiles. Stir to combine fully. Reduce to simmer and allow to cook for 5-8 minutes.
  5. Place the taco shells in the baking dish, standing up. I was able to fit 10 taco shells in the dish by adding 2 on each side.
  6. Spoon 1 tablespoon of beans into the bottom of each taco shell. Top with the chicken mixture, almost to the top of each shell.
  7. Sprinkle each shell generously with shredded cheese.
  8. Bake for 12-14 minutes or until cheese is fully melted and the edges of the shells are browned.
  9. Remove from the oven and top with your favorite items such as jalapenos, sour cream, cilantro, and salsa.